Nails & Needles

Of knitting and nail polish

Bare Necessities: My Mini Nail Kit

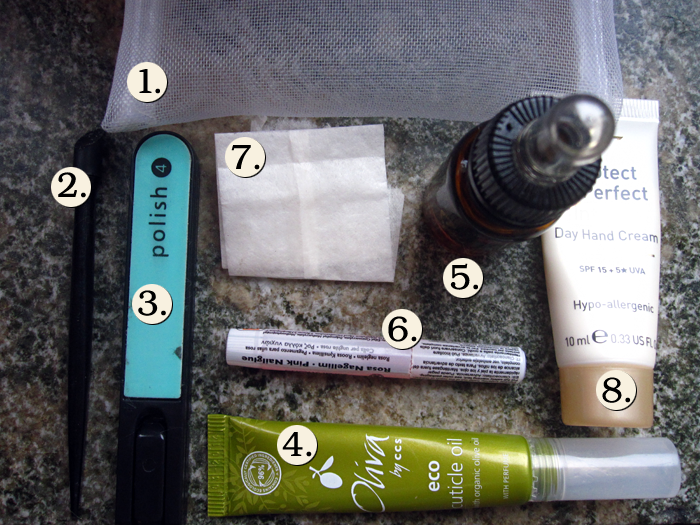
I don’t know if anyone’s actually curious to know this, but today I’m going to show you the little kit I always keep in my bag so I can properly take care of my nails even on the road.

  1. The small mesh bag I keep it all in. Bought at H&M for a tiny penny (I think the equivalent of £3/$5) and it came with a nail file/buffer/polisher, a nail brush and a plastic orange stick.
  2. Plastic orange stick. For pushing back my cuticles and also for mending torn nails*. Came with the mesh bag when I bought it.
  3. Foldable nail file with shape, smooth, buffer and polish surfaces. I might have to replace this one soon, as I sort of broke it a while back. Still works, mind!
  4. Oliva Eco Cuticle Oil. I really like the brush on this tube, makes it so much easier to get the oil where I want it!
  5. Scratch Nail Food. Nail oil based on sesame oil, with added lavender and myrrh for scent. I try to massage some nail oil into my nails at least two or three times a day, so it’s a good thing to have in my kit, since I can do it even if I’m not at home.
  6. Nail glue. In case of torn nails*.
  7. An emptied out, unused tea bag. Again, for mending torn nails*.
  8. A small tube of hand cream, because my hands get ridiculously dry, especially in winter, so it’s a good thing to carry around. Right now, it’s No7 Protect & Perfect Intense Day Hand Cream, but it varies depending on what sample size tubes I have on hand.

So that’s that. Do you have a nail kit you always bring with you? If so, what’s in yours?

*See this post for how I use them.

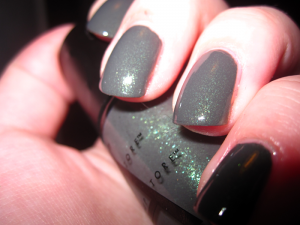
Make Up Store Tanja (Shimmer 101)

I wasn’t very interested in this shade when I first picked it up to look at it in the store, but then the light hit the bottle at just the right angle and holy wow!

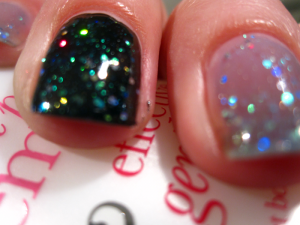
This is a dark greyish green base with, mainly, green microglitter suspended in it. I think there is an element of duochrome in some of the glitter particles too, however, because sometimes you can catch a glimpse of a little red in it as well.

The shimmer effect in this is very, very subtle, almost completely muted by the base colour. But then, like at the store, the light hits it from just the right direction and suddenly the sparkles appear! Honestly, that’s half the charm of this polish. Unfortunately, this also makes it quite tricky to catch the effect in photos. Pictures just don’t seem to do this polish justice at all! (That’s why sucky flash photo is included.)

I needed two coats this time, but with careful and methodical application, one generous coat might well be enough to do the trick.

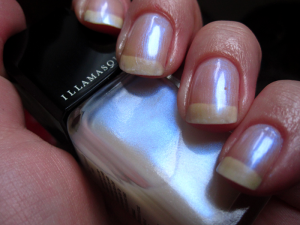
Illamasqua Christmas 2011 Quad

I know, I know, we’re coming up on Christmas 2012, so yes, I am a year late. But, never you mind that: this is still a great little set! It’s also my introduction to Illamasqua’s polishes. Normally, these babies run at £13.50 a pop, but I snagged them up at Illamasqua’s summer sale a few months back. Who wants Christmas polishes in July? For £15 for the four of them, I sure as hell do! ;)

Prism: There was one polish in the set I was certain I would never use, because I hate sheer polishes, but hey, three for £15 is still a pretty good deal!, so I didn’t really care that one would be unusable. Of course, once I had it in my hands, I had to at least try it once, y’know? So I did, and I was sold! Prism is gorgeous! It’s a sheer, milky duochrome that is obviously never going to be opaque on its own, but  I don’t care! I’m wearing two coats here just to show what it looks like by itself. I can’t really wear it this way since my nails are crazy discoloured, but it also works perfectly as a layering polish over something else.

Elope: Lovely grassy green colour, really annoying formula. It took four coats to begin looking this even and non-streaky. Thing is, this is a wonderful colour and I want to wear it a lot, but boy, do I not have the patience for four-coater nightmare polishes! Next time, I’m wearing underwear with this. Will certainly save a looooot of time.

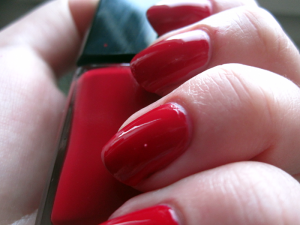
Throb: A gorgeous vibrant red creme and a nice surprise after Elope. I dreaded another four-coater, but this ended up only taking one coat to cover completely. One. What is this? Not that I’m really complaining — yay for one-coater reds! Great for when you’re in a hurry and so on, but consistency, anyone? A bit of that would be quite nice now and then. Just sayin’.

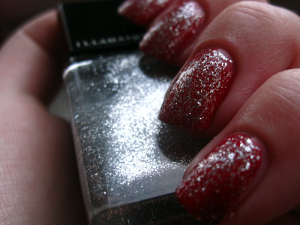
Harsh: What’s a Christmas collection without a glitter polish? Nothing, that’s what, so of course one was included here. Harsh feels very aptly named. It’s got to be the harshest silver glitter I own (and OPI’s Pirhouette My Whistle is the softest). Here it is as one coat over Throb. Much like Prism, Harsh is best layered over something else, though obviously you can wear it on its own, if that’s what floats your boat.

All in all, the brush on these demanded a certain amount of concentration on my part, but I think that’s just because this is a new brand for me. I always need a little time to get acquainted with a new brush.

My favourite of the four is Throb, the biggest let-down is Elope and the biggest surprise Prism. All of them quite worth the £15 I spent.

H&M Five Polish Pack

I’ve already shown you one of these five little goodies on a Blue Monday, but here’s the whole lot!

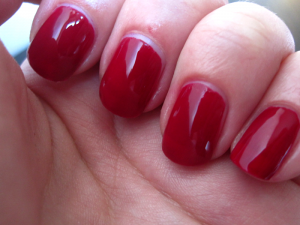
0514 Red: I’m having a hard time figuring out if this is a creme or a jelly. It both looks and behaves like a bit of both, so I guess it’s kind of a cross? Needs three coats if you want rid of VNL, though it’s not as obvious at two coats as the photo would have you believe. The colour is also a bit darker/deeper in  reality than what the picture shows, but my camera (like so many others) absolutely hates red shades.

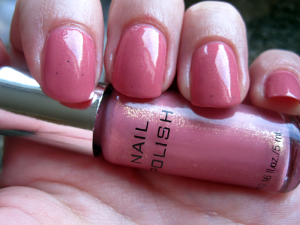
0515 Pink: I’m not at all a fan of pinks with shimmer, but I actually don’t mind this one as much as I thought I would. Maybe because it’s more like gold microglitter, rather than shimmer. Well, that, or I’ve just myself put myself in the way of enough shimmery pinks that I am now starting to get immune to their wiles. ;) Anyway, two generous coats and Bob’s your uncle!

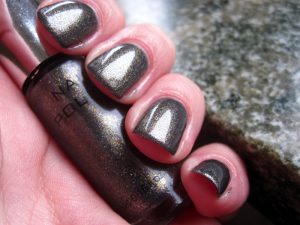
0516 Black: This is a dark grey jelly base with gold and blue microglitter. The first coat is very sheer, but it actually only needs three to become opaque, which was a nice surprise. If you don’t mind VNL, you might even be content with two, although then you’d have to settle for a medium grey colour. Even at three coats, I wouldn’t quite call it black, but I can see how “Really Dark Grey” makes for a less than stellar colour name.

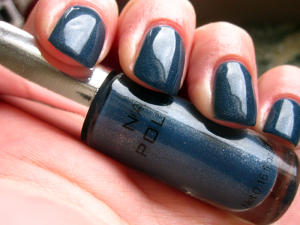
0518 Blue: Three coats of this gives you a beautiful blue with silver shimmer and no VNL. This may well be my favourite of the five polishes in this pack. In fact, this is the one I mentioned showing you before: I featured it for my second Blue Monday (and how my nails have grown since I took that photo!).

Nail Polish Matte: Is this the best matte top coat I’ve ever tried? No. Is it the worst? No, not that either (I’m looking at you, Depend Matte Top Coat. You suck!). It’s actually quite decent and if I didn’t already have a bunch of others, I’d have appreciated this one a lot more!

Overall, this is a really nice little collection of polishes. The formula on all of them is nice and easy to work with, as are the brushes. The only issue I have (aside from the shimmery pink ::cough::) is the brush handles. They store a lot of polish, so if I don’t pay close attention to what’s going on with them, I risk dripping polish all over the place. I mean, I like nail polish, but I’d rather it go on my nails than on my clothes and furniture, thank you very much.

How to Save a Nail

Today I thought I’d tell you about a little trick I learned from the Internet. Obviously, if you’re a fellow nail blogger, you probably already know this trick, but if you’re not, then this might be a new life saver! The first time I read about it was on, I believe, Lacquerized.
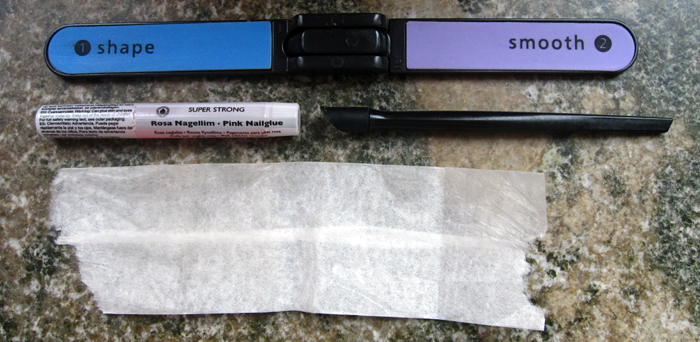

What you need: nail glue*, a tea bag**, an orange stick (cuticle pusher) and a nail file.

Oh, and a broken nail. See, this trick can save a broken nail so you don’t have to file it down. Brilliant, right?

Now, it’s not going to fix it fix it, as in re-attach it permanently to the rest of your nail, so you will eventually have to file it down, but this enables you to wait until the nail has grown out enough that you can file it down a bit but still have it be the length you want.

  1. Make sure your nail is clean and dry.
  2. Stick on a bit of nail glue.
  3. Tear off a small piece of the tea bag (you could cut it with scissors, but I prefer just tearing it — keeps what you need to have in your kit to a minimum) and stick it on top of the glue.
  4. Use the orange stick to smooth it out so that there are no bubbles and lies flat on the nail. (Sometimes you need to apply a bit more glue to ensure this.)
  5. Apply another coat of glue.
  6. Stick on another little piece of tea bag.
  7. Repeat step 4.
  8. Once the glue has dried completely, use your nail file to smooth out the surface.
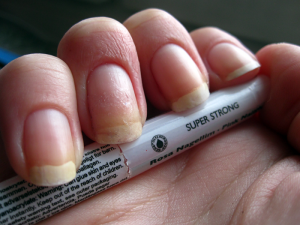
Done! Now you can apply your nail polish as usual and not worry about tearing your nail further. It might look a bit less smooth than usual, but with a properly applied polish on top, it should be barely noticeable that something is up with your nail.

If you use a gentle nail polish remover, you can even change your polish without ruining the tea bag mend. However, you might not be able to get all of the polish off, as evidenced by the teeny tiny leftover purple polish you can see on my nail***. Still, that’s a minor inconvenience, compared to hacking off most of your nail.

*I always have an emptied out tea bag and a tube of nail glue in my bag. It’s a good investment and nail saver! Nail glue is available at most beauty supply stores (sometimes you’ll have to buy a pack of fake nails to get it, but not always. Depends on how big their selection is!) and through eBay. I bought a 10-pack of nail glue for about 3 bucks on eBay a while back when I had my fake nail phase, and I’ve not even made a dent in it yet. So, lasts for ages and if it’s not mid-emergency, it’s dirt cheap!

**There are silk wraps available for nails, so if you can get your hands on those, great! But, I haven’t seen them in any shops yet and in an emergency, you’re likelier to have access to a tea bag, which works just as well. The first time I tried this trick, I use a silkier sort of tea bag and had little success, so I would advice to go with a paper tea bag, which is what I’ve used since.

***As you can also see in the photo, my ring finger is ridiculously dry. It’s due to my allergy to oranges and carrots (which presents itself as a rash on my right ring finger and nowhere else on my body. Seriously, nowhere else!) and is one of many reasons why my left hand is my blog hand.
Blue Monday: H&M 0518 Blue

It’s that time of the week again: Blue Monday!

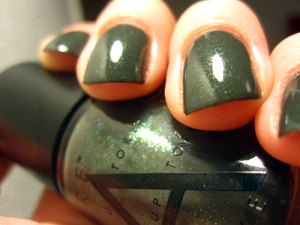
This week, I’m seeing how long I can keep one single mani without changing, so I didn’t have time to paint my nails blue today. However, I did have a blue polish in my photo archive, so I’m showing that instead.

This is a gorgeous blue with silver microglitter that was part of a little combo pack of nail polishes I bought at H&M. It’s called Blue, quite simply, with 0518 added on to differentiate it from every other H&M polish called Blue.

It applied like a dream and needed barely any clean-up. Yay for that!

Blue Monday: Peacock

Quick one today for Blue Monday, run by Mrs Data målar naglarna (a blog well worth a visit even if you don’t read Swedish!). I promise I’ll try to be back with more as soon as I get a working internet connection in the new flat.

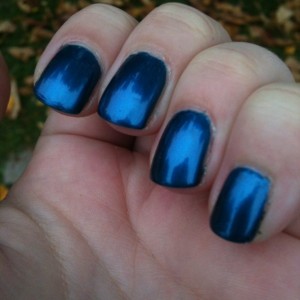
Anyhoo, for my first Blue Monday entry, I decided to try out a new Isadora polish from their fall 2012 collection. Peacock is a very shiny blue metallic. It covers well in two coats, though behaved a bit wonkily with my current base coat combo. That could be due to my own impatience in painting, however, so I’m not willing to count it out just yet.

Go check out the other entries for Blue Monday here!

Quiet

I’ve recently moved to a new apartment and I don’t have an internet connection there yet, so I’m afraid posts will be sparse for a little while until I get everything settled! I’m swatching like crazy in the mean time, so expect lots of new things to look at once I get fully connected with the world wide web again. ;)

H&M Blue Bliss

 Remember how I talked about the many uses of a good black creme polish? Here’s a perfect example of what I mean!

H&M Blue Bliss is a sheer blue jelly polish with small hex glitters in red, green, blue, teal and gold (and I think even some holos). On its own, even three coats leaves it extremely sheer and makes you look like you’re about to freeze to death. A look some may like, but certainly not one I strive for on a daily basis… ;)

If you layer it over black, however, it’s instantly transformed and the glitters really come through. Over black, it’s like a completely different polish: one at least I can’t stop looking at!

It sparkles and glitters and shifts colours as you move your fingers. Absolute brilliance!

Formula-wise, it’s easy to work with and dries quite quickly, unless you apply multiple coats. There’s no reason to do that, though, as the glitters come out of the bottle quite willingly and you don’t need more than one coat over your base to really make it pop.

H&M Look At Me

Remember Lady Luck from a week or so ago? Here’s another shimmery gem I picked up from a later trip to H&M.

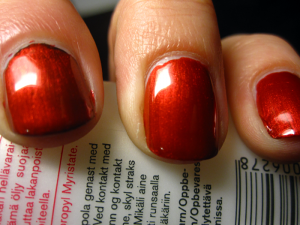
It’s called Look At Me and I can guarantee that that is exactly the statement your nails will make when you wear it. It’s a very vibrant, very shimmery red with an intense glow “from within.” I love it! (I wore it over OPI Lady in Black on my index finger, to see if the black made a big difference, and while it does make the glow deeper, it’s not absolutely necessary to make it look good.)

Like Lady Luck, this does run the risk of having brush strokes dry apparent, but with a little care while applying, it’s not really an issue. The formula is a little thin too, so if you have too much polish on the brush, you end up with fingers looking like mine in the photo here. ::cough::

All in all, lovely little thing, this. I can see myself wearing it for Christmas.

Post Navigation